Showing posts with label quilting. Show all posts

20 February 2017

WIP Finished for Refugee Family

Somehow the past year and some feels like a blur. I have been a stay at home mom for almost 15 months. I took a leave of absence/loss of mojo for about two years, but I am getting my feet wet again and I want to share about this blanket I finished.


I started it back in 2013, and it stayed folded up and stored. 

The women's group at my church, called the Relief Society, adopted a refugee family through UNHRC (United Nations Human Rights Council). We gathered household items and fully furnished an apartment. My heart was moved with compassion and I had at least 4 quilt tops waiting to be finished, so I decided to donate the top, batting and back. I didn't have enough time to machine quilt it; and I wanted to include other ladies in our Relief Society to help finish the quilt, so we tied it. I brought it to our church during the day and some ladies took turns helping me mark and tie the quilt. One lady even brought her homeschooling sons and used the quilt tying as a review math lesson. We used 100% cotton thin yarn and darning needles.

Once it was tied, I brought it home, did my best to square the quilt. I machine bound it with scraps left over from the blocks on the quilt. I made a roll of binding for this quilt shortly after I finished piecing the back.


I felt so happy that I had this quilt in a state of "readiness", and ready to be finished waiting in my closet.

16 January 2017

Deanna Gets Real

I took a long break from blogging and quilting over the past year or so. November 22, 2015, I was rushed in for an early emergent C-section. We had a scheduled one planned for December 2, but my babies decided to come earlier than planned.


Amelie in front, Jane in back

We found out at 18 weeks one of our sweet girls would not live long, if at all, after birth. Our other baby grew slowly. Their growth was monitored carefully, and we prepared ourselves for bringing home one baby; while mourning the loss of the other one.

Thanksgiving in the NICU
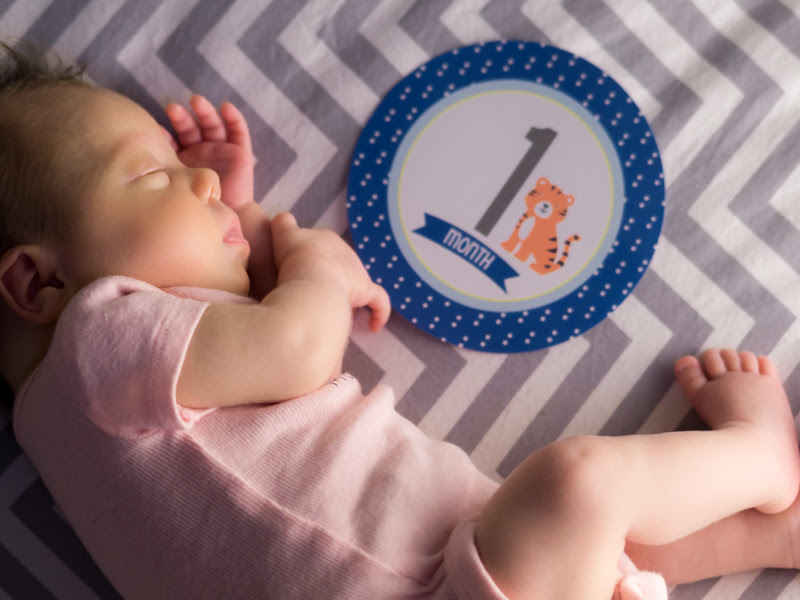
After 3 weeks in the NICU, we were able to bring our baby Jane home. I found myself in awe over her tiny body, tiny fingers and toes, that was healthy. I felt very blessed for having such a robust little girl; and I felt pained at the loss of our other daughter Amelie.

Home at 1 month old
Jane and I tried very hard to breastfeed, but were unsuccessful, so most of my days revolved around waking to pump, freezing and thawing breast milk and eating enough to make more. Jane continued to grow at her own pace and by 4 months, made it on the growth charts, however she was unable to roll over or sit up on her own. At about 4 months, I felt a change inside.

I was trying so hard to feed the baby and play with the baby and recover from surgery and on and on, postpartum depression sank in, and by month 5 I decided to get some help. I was prescribed some medication which took the edge off. My husband was assigned to work out of state for 10+ weeks, so I retreated to my sister's home and stayed with her while my body adjusted to the medication. She helped me so much. She, in her no nonsense way would allow me to cry and would cry with me, tell me it was ok to stop pumping, and helped me teach Jane to roll over and sit up. Jane cut some teeth and as if an alarm went off, she was able to roll over, sit up and scoot on her belly.

Now, Jane is an active 14 month old and enjoys independent play. I finally feel ready to begin quilting, sewing and blogging again.


17 April 2015

I've Lost that Quilting Mojo

After finding out our first IVF attempt was not successful, I fell into an emotional and creative funk. I am lucky, though, my husband was supportive during this time. As I look back, I can tell having my hormones decrease quickly greatly contributed to the depressed state. Subsequently, I have had a difficult time trying to get quilting again.

I decided that I would begin to tackle some of my WIP projects.

I went back to my Block of the Month project, a free class offered by Craftsy taught by Amy Gibson, in an attempt to conquer my FEAR apprehension of paper piecing. I dug through my box of fabric I have set aside for this project and found some pieces that were still big enough for me to use.  I picked my fabrics, cut out my paper templates and "sewed" over the lines to perforate the paper.  I did my best to keep my fabrics similar - meaning having the same fabric in the same spot for each piece.  
I chose a patriotic theme for this project

Honestly, I had a hard time keeping fabric A, fabric B and template all together.  I had to rip out some of my seams which resulted in a casualty of one of my templates. 
MAJOR FRUSTRATION

Some of my fabric pieces don't go all the way out to the edge of the template.  I found that super frustrating.  
Semi-Complete parts of the paper piecing block

So here I am asking the bloggosphere - what are your paper piecing tips and tricks.  how do you get those layers to stay straight and keep your template together?


30 January 2015

Finishes for Friday

I busted it out this week and finished one quilt, one pin cushion, and one quilt top.

The baby quilt was blogged about here.  I added a picture to share in case you don't want to jump over to that page.


My pin cushion was made from a scrap piece of muslin and an orphan block made from scraps of the WIP Teal Flying Geese Chevron.

I decided to make this pin cushion because I didn't like having to get up from across the room to grab the magnetic one once I decided to sew whatever I pinned.

I put a scrap piece of batting on the back of the block.  I practiced my FMQ skills and stiched the back to the top, trimmed my corners and turned it right side out.  I read somewhere that it was a good idea to add rice or walnut shells to add weight to pin cushions.  Being dedicated to using what I had on hand, I used rice.  I stuffed the rest with some polyester stuffing I had left over from another project.  

Pay no attention to the rouge hand sewing!

I also sewed the blocks together for Naughts and Crosses.  I love the play of the bright yellow contrasting with the deep navy.  I first found the yellow and navy floral prints all bunched together on the bolts.  My heart squee'ed (is this a word??) for joy.  I then collected some more yellow and navy fabrics from my stash.  I even picked up a vintage yellow and light blue floral print and incorporated it into a couple of the blocks.

Another quilt I cannot fit in the picture UGH!

 I tried my best to match and nest seams, but as with all of my projects - I had to fudge a little.  I had a hard time getting the O or the Naught blocks through the needle.  There was quite an intersection of seams and layers there.  I mitigated that by encouraging the blocks through the sewing machine - I tugged on the blocks as they were coming through the back side of the needle.  I am pleased with the way this top turned out.  I need to add a border, but I am stuck with what color and how thick the border should be.  This quilt will be for my Husband so he has something nice to snuggle with on drafty winter mornings.


 I think I will use an all over meandering FMQ for this quilt.  I am thinking about using navy Aurifil for the quilting.

I haven't decided for certain.  What do you think?  Would you use a dark thread or a light thread to quilt?  Would you add a border?  What color border would you add?

Please leave your feedback in my comments section.  Thanks!


29 January 2015

Shameless Promotion for Amy

Being a quilter kind of gets you into a "club" of sorts where other quilters, no matter your skill level, always remember you when there is a sewing evening afoot.  

This is Amy.  I stole this pic from her blog.
I Met Amy about three years ago through church.  She learned that I quilt and periodically, when her husband is out of town or camping with the boy scouts, she hosts a sewing night.  These events are always full of ladies, sewing projects and yummy snacks.  We settle in with our various projects and give each other feedback.  I have met so many wonderful ladies through these evenings.  Amy always passes on her well used magazines or random scraps that she is getting rid of "gives away prizes" at the end of the night.  Generally there is a charity quilt for people to learn on.

About 4 months ago Amy emailed me and asked me to help edit a book wrote.  I felt honored that she would ask me for help.  At first, I thought she asked me to edit grammar and text.  But NOO!  Amy wanted my feedback on the explanations and clarity of her instructions.  I guess she needed a quilter who is a bit "dangerous". I can get myself in a quilting pickle, but am not always the best at getting out of said pickle.

Amy's Book Frazzled Fancies
 Amy truly has the mind of a quilter.  She took the pages for each topic and taped them together in a long column.  Her tutorial for her Frazzled Fancies blocks were deliberate and easy to understand.  She didn't waste an inch of space on the page and references many pictures to help readers and quilters understand how to make the block.  The best thing about Amy's method is her creative use of materials, and her attitude about quilting.  She believes that mistakes are going to happen, and precision quilting isn't the only way to quilt.

Check out her blog and etsy store


27 January 2015

Oh My Heart Finish

I started this project just a wee bit ago.  I am feeling SUPER accomplished for THREE reasons.

Reason the First  - It is the quickest "from concept to finish" quilt I have EVER finished.  I blogged about that HERE.  I started January 17 and finished it January 26.  


Planning Phase
Pieced and in Strips - rough lay out
Reason the Second - I sewed from just my stash.  When I first was inspired, it was quite late at night and I knew I needed to stick to what I had on hand.  Generally, things are kinda lean at El Casa del McNay around this time of year anyway.  PLUS like most quilters I don't use the fabric as quickly as I buy it.  I have scads of random scraps that I just need to cut into usable bits and put in my storage containers.  I have them neatly labeled with the size of the squares.

Quilt back with left over purples from my stash

Reason the Third - I used Free Motion Quilting on this project! (woot woot)  Ever since my first pieced quilt fiasco (read about that HERE) I am gun shy about FMQ.  I made some of the same mistakes, but I took the time to pick them out and make do with what I had. 


FMQ and Straight line. <3 that scrappy binding
Showing off the drape
I did learn some more quilting lessons.  I should have spray basted and use more pins to baste this quilt.  I also should have ironed and starched the top.  I think both would help with the shifting.  This size was less intimidating than other quilts I completed on my home machine.  


Finished and my *heart* is happy :)

I am overall pleased with how nice it washed up.  It's true that the quilting can hide a multitude of quilty sins!  Perhaps quilty inexperience is the better term.

My Husband told me that the quilt looked like a broken heart.  He felt the low volume squares and the light pink squares didn't provide enough contrast.  I used straight line quilting on the heart squares and meandering Free Motion Quilting on the low volume squares and the border.  I think the difference in quilting helps the heart shape to pop out more.


All wrinkly from the first wash.

 What would you do to make the heart "pop"?  Have you ever had a quick finish?  Tell me in the comments below!  I love your feedback!


22 January 2015

What I Learned...My First Pieced Quilt


Back in the days of yore when I decided to start quilting, I mean quilt for real; not just sew some fabric and use yarn to tie it up, I went to google and found an easy quilt pattern HERE at www.allpeoplequilt.com.  It seemed easy enough.  I grabbed my trusty 3x12 inch ruler, self-healing mat and set to work.
What the quilt was supposed to look like (from apq.com)
I printed the directions and went to a few different fabric stores and searched through their remnant bins and their fat quarters.  Once I had decided on my bright colors, I brought home my fabric washed it and began cutting.  Against my better judgement, I will share pictures of my first quilt.  It will illustrate the lessons I learned.


What I Learned Making my First Pieced Quilt

  • Lesson One - Don't sew your first block until you have the rest of the fabric cut for ALL BLOCKS. This way when I have time - even if only a half hour, I can sew a block together and set it aside for adding to the rest of the quilt.
  • Lesson Two - Don't freak out when you make a mistake.  Sewing your first pieced quilt means you will make mistakes.  I found that when I made the most mistakes was when I was cutting the various strips for the block.  If I had done all the cutting at once, I could have got into a rhythm and made fewer mistakes.  I would have also known earlier in the process that I didn't buy enough background fabric.
  • Lesson Three - Ask for help.  Find someone who has quilted before you and ask for help when you get stuck.  I should have asked my friend Tricia for advice.  She was not a huge quilter, but had taken a class before.  That is one more class than I had under my belt.  Even if I didn't know Tricia, I should have asked at a quilt shop.  People in the quilting community are willing to help a newbie.  I also find loads of help looking at tutorials on youtube.com and searching quilty blogs.
  • Lesson Four - If it feels like a short cut, then you're probably not doing something right.  When I was sewing my completed blocks together, I used a pin every foot or so.  (the blocks were only 12.5 in)  I sewed a whole row together and I sewed the blocks wrong.  I had to pick my stitches, consult my print out and start over.  In quilting, being a 1/4 inch off is a big deal.
    I thought the binding would make up for having an uneven quilt back
     
  • Lesson Five - Square Your Blocks.  My blocks had all sorts of jagged ends.  Some strips of the blocks were too long, others just barely made it to the 12.5 mark.  I decided that seam allowance would hide most of my mistakes and the binding would cover the rest.  If I had known to square them, then I would have to fiddle with them less. 
  • Lesson Six - The top speed of the sewing machine is not for all projectsSewing two pieces of fabric together is one thing, and an experienced seamstress can go full-tilt.  As a beginner, it is ok to take your time.  Learn the quirks of your machine.  If you know you need to start needle down, do it.  If you know you struggle sewing a straight line, slow down.  Eventually your skills will allow you to sew faster.  This is especially important for Free Motion Quilting.  Too fast, you skip stitches and get eyelashing.  Too slow, your bobbin thread will not like you.
This is what happens when you try to quilt too fast


  • Lesson Seven - Make sure the product you have is the right product for the job.  I was super afraid of Free Motion Quilting.  I just couldn't handle making huge mistakes.  I made a few pot holders for practice (like making and sewing binding).  I quilted them using straight line quilting.  My little quilt sandwiches were manageable on that scale.  I was apprehensive with Free Motion Quilting such a huge thing, so I bought a polyester fusible batting for this project.  It was on clearance and I felt good about the price.  (this was before the giant roll of warm and crafty I bought)  I either did not pay attention to the directions or had my iron too hot, but I had to peel the back off of my sandwich two or three times because it kept wrinkling up.  Finally I just started quilting "the good spots" and that caused the fabric to shift all over the place. 

I quilted a fold on the back of my quilt - should have pin basted too!


My Version - check out that jagged edge

16 January 2015

Oh my Heart - A quick turn around from Idea to a quilt top - Kinda


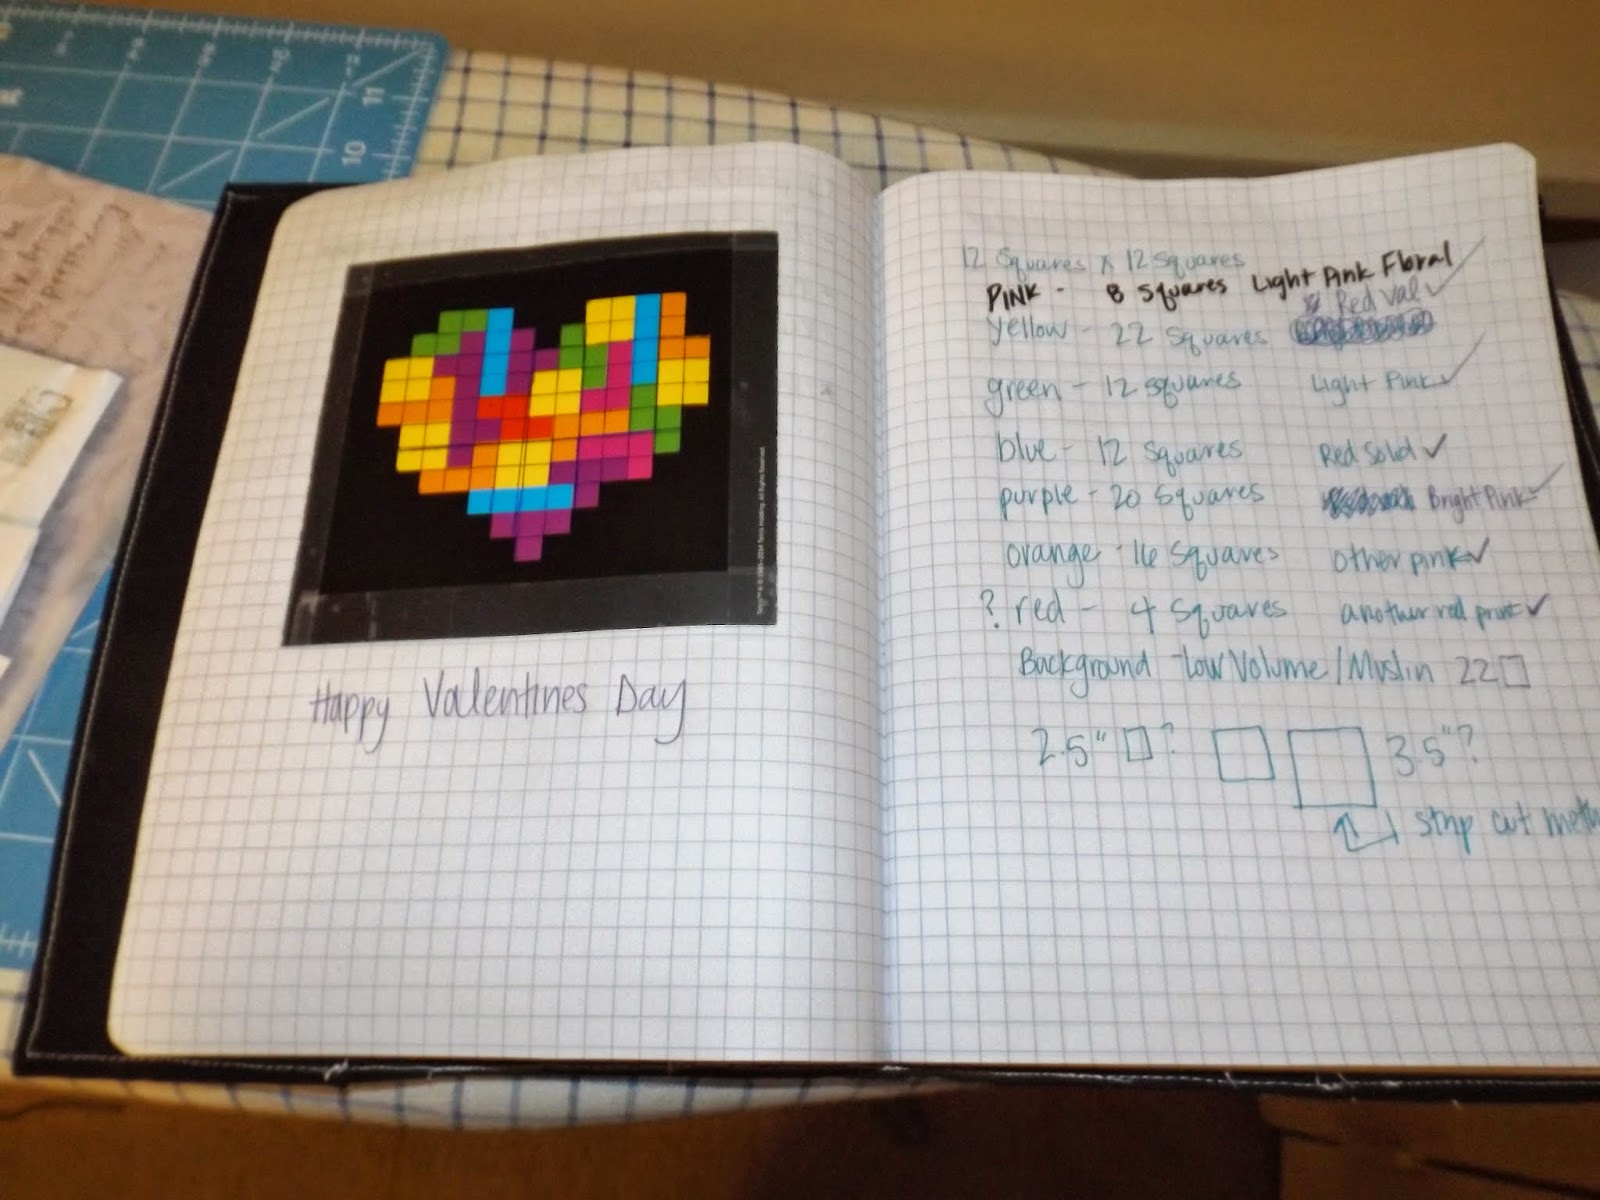
My Husband bought me these Tetris stickers that look like the terminos.  He knows I like to play the game and create shapes.  He bought them while he was on a business trip and had some time to kill before flying home. There are many who have made Tetris quilts, and I may have mentioned it to him.  At any rate he saw them and snatched them up. This was one of my Christmas gifts.

When I saw the outlines for suggested shapes one can make with the stickers I thought VALENTINE WALL HANGING.

The Inspiration - struck just Tuesday
I created a key for myself and picked out fabrics from my stash.  The red and white one has arrows with heart-shaped arrowheads.  There are some scraps of some red Kona, pretty light pink floral, red with white polka dots, a light pink with white hearts and a super sweet stripe with pink bars and little rose buds.  

I used low volume charms from an online low-volume charm swap and other low volume fabrics in my stash.

I know it's kind of hard to see, but it is a pretty heart.  It is a LOT bigger than I imagined it.  I probably should have used 2.5 inch squares instead of the 3.5 inch squares.  Each row has 13 squares.

Blocks sewn together for a Valentine Surprise
So far this is the quickest turn around I have done from idea to sewn.  I still need to sew the strips together.  I am pleased with the quick turn around and decided to stop sewing at 12:30 am.

I took a few quick pictures and wanted to share my "Friday Finish".  I promise to post more pictures when I sew the strips together and get it all cute and quilty.

I am thinking about adding a muslin border about 6.5 inches around the whole thing to help the reds and pinks stand out.  I also thought about adding a grey and white chevron fabric border, but then perhaps that might compete with the reds and pinks.

Sound off and tell me what you would do!  I love getting comments from the community.

13 January 2015

Deanna's Dresden Quilt Top Finish

I am so very excited about this finish.  I started working on this quilt last spring.  I wanted a color scheme that I loved and I found this fabric.  It is floral without being super girly and included my favorite colors - orange, yellow, and navy.  I started collecting fabrics based on these colors.  

Inspiration Fabric
My goal with this project was to do it in steps and not skip ahead and make a block and then start over again to make the second block.  I started by cutting out 600 dresden blades, and then chain piecing them.  I then trimmed the seam allowance and docked the corner to create the point.  I used my scissors to turn the point.  I then starched the dickens out of the points and threw them in a box.  Every couple of days or so I would cut a 12.5 inch square, pick out my blades, sew the dresden and appliqued it.  

I admit I got sick of making all those blades day after day.  I wasn't super gentle and ended up poking through some of the points.  Some of the I would work on this project when the mood struck, but I didn't stick with it until it was completed.  It was nice to not place pressure on myself to get it done.  I enjoyed taking my time and creating.

Well, I worked and worked - and ran out of blades.  I was three blocks short. I got super frustrated! I put off the rest of the blocks for some time and then after a few months, I decided to bite the bullet and cut the rest of my blades.  I decided I would make two non-pointed dresdens, just for fun.  I also cut one set of blades shorter than the others to vary the look of the dresdens.

Uh Oh one extra block
 I chose to use the same fabric for the center of each dresden.  I wanted each block to look like it could stand on it's own and also "go" with the other blocks. I think that the middles give a place for they eyes to rest.  

With the remaining yellow fabric, I cut 2.5 inch strips and added a thin border.  For some reason, I don't like the look of blocks without some sort border.  I think it makes me mad because the points get lost.

Ignore the pile of fabric and batting in the right corner

I like how this quilt looks different from different angles

The VERY bestest part of this whole project is that I found 5 yards of vintage navy floral at a thrift shop.  I got the whole piece for 8 bucks!!!  

I plan on using the left over Kona Tangerine or Kona Sunset (perhaps wrong name) for the binding.  I plan on using the extra block and left over to widen the back.
Steal of the Year! (2014)
Once again I am at a loss of how to quilt this one.  I don't want to break a needle, and I only have my little domestic machine to quilt with.  I thought I might just follow the outline of the plates using my walking foot.  

Have any of you ever quilted a dresden?  Any suggestions?

08 January 2015

An "Instant Gratification" project

Hello Quilty and Non-Quilty Friends!

I hope you had a grand holiday season.  Although I spent a lot of time loafing around the house, I felt well rested and dare I say a wee bit excited to return to work. (!)

I made a list of projects I wanted to complete in my trusty grid composition note book.  I may or may not post them.  I haven't decided if I want the world wide web to keep me accountable or not.  Nevertheless, I started a project around 9 pm last night.  I think I finished around midnight.  I know It took at least 4 Greys Anatomy episodes to finish - including mistakes and remeasuring, recutting, picking stitches and pinning in the right places.

I used an old jelly roll I picked up at a Tuesday Morning store (discount, factory seconds, unsold stock)  I purchased it to add more green to my stash.  I really liked the combination of bold floral, stripes and geometric patterns.  This particular jelly roll only had two 2.5xWOF strips of 6 prints.  I wrote down some instructions, and stitched all of the jelly roll strips together.  I measured and trimmed my strips to what I thought was the correct width and length - according to my chicken scratch.

So I finally swallowed my pride and went to THIS tutorial by V and Co.  I trimmed my sewn strips to short, so it was not wide enough.  I added a strip of the pocket (inside of cover fabric) to the sewn strips and then turned and top stitched the cover.  The moment of truth - and the cover did not fit.  

By this time it was late and I was super determined to finish something, so I tucked my puppies in to the kennel and grabbed my trusty and overused seam ripper and picked out the stitches that secured the inside flaps.

I reassessed how far I needed to fold them and then gave myself a bit more wiggle room for seam allowance for the top stiching along the front of the cover.  I pinned and sewed, grabbed my composition book and slid on the cover.  It was a wee bit big, but I figured since it was well past midnight, I would leave it as is and call it good enough.

I do like the colors and the bands of black that outline the strips.

Completed project with trusty tools

Inside front cover


Inside back cover
Back Cover


What I would do different so I didn't have any problems
  • Slow down and not charge through a project until completion when it's late. Maybe I shouldn't start a project after 9 pm
  • NOT use my 1/4 in. foot, use my all-purpose foot or my walking foot.  The corners get pretty thick.
  • NOT use contrasting thread
  • Sew it upside down with the bobbin thread on the inside and the "pretty" top stitching on the outside.
  • MEASURE my composition book.  It has been my experience that each one has a slight variation.  This can be due to use or glue ins OR just natural variation that comes from the machining process.
  • Perhaps starch my fabric?

I NOW KNOW WHAT NOT TO DO.  I think I will try this again to make gifts for friends.  I also had originally intended to practice my FMQ skills, but I got too focused on getting a completion.  I think I will FMQ and use an orphan block on the front and back and then add strips to build out for the correct width and height.

Do you ever get so focused on the get it done that quality work is sometimes sacrificed?

Please leave a comment!  I love to hear from you

18 December 2014

Yuletide finishes


 It's the Holiday Season

Perhaps you started handmade, heartfelt gifts for Christmas or birthdays and then got caught up and then life took over?  That is exactly what happened to me last year.  I was determined to not only complete WIPS started for the holidays last year, but I would also get them done before December rolled around.   I think mug rugs/snack mats and place mats are great for practicing skills or demo blocks.  They go together fast and like cooking in a microwave; "instant" gratification.  These two projects are also neat for trying out decorative trims or new products.  You can have a project like this pieced, sandwiched, quilted and bound in about two hours.  (If you are beginner it may be longer)  And like most quilters I get a wee bit giddy when I pull projects out of the dryer.

Although I did not complete my goal by getting WIPS done before December, but I am 98% complete with the Yuletide WIPS.
First Mug Rug or Snack Mat

The first is a mug rug in solid green and low volume prints, FMQ'ed with a meandering squiggle and a botched flower in the middle.  My FMQ skills are not the best, but I try.  (Perhaps that is why I have so many tops finished and they sit waiting.)

Used zig zag stitch to keep from rolling up in the wash
Mug Rug Back

I used stripey green to make a binding.  I also like the Christmas fabric on the back.


I also made four place mats using a QAYG method.  I picked various fat quarter Christmas prints and left over fabric from the stockings I made last year.  This is a great project for scraps or orphan blocks.  I also used scraps of batting trimmed from quilts and other projects. 

I used decorative stitches to decorate the place mats over a few seams.  I used red, white and cream-ish natural threads.  I used my walking foot to complete the QAYG.  

Four place mats posing for photos
Decorative stitching showing up on back - right side a chain of snow flakes
More decorative snow flakes

red zig zag contrasting with blue, green and cream

I just love those happy little trees!

I cut the binding on the bias, but it didn't give the effect I wanted. I also used some decorative stitching on some of the place mats. 
used zig zag to keep binding from rolling and add pizazz
Fitting PERFECTLY into poly envelope!

Have you ever focused on a handmade Christmas? 

Another general question - do you find that sometimes your phone camera does a fantastic job and other times all the pictures look like junk?  All pics taken with iphone.  One thing I did ask santa for was a camera so I can take pictures of stuff for the blog.